Fun, Finishing… and moving the bar
My personal goals this quarter include spending more time making art AND telling the stories of work in progress, both as part of the creative process and to have some accountability. So I revising this Friday tradition in the first of what I intend to have as aregular series, though perhaps not EVERY Friday. The intent of this series will be to provide an update on progress towards reducing my collection of UFOs (UnFinished Object) aka WIPs (Works In Progress – which should technically probably be written as WsIP – but nobody does that so I am going with the crowd).
Project 1: Microwave Bowl Cozies
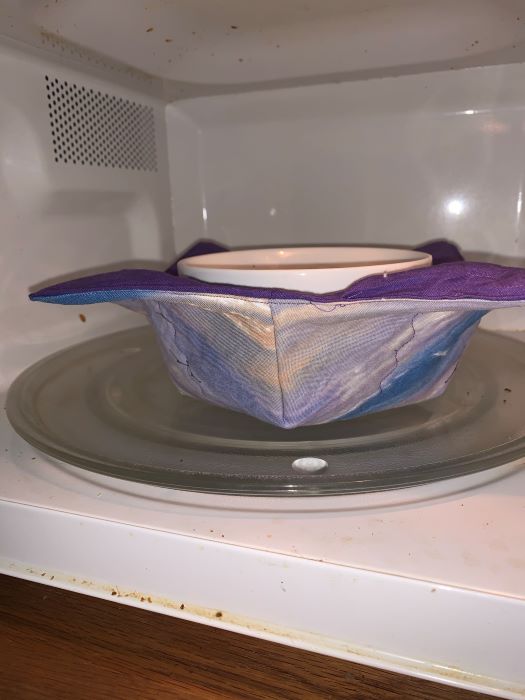
I have been making this fun little projects for gift sets for some time now and they are always a big hit. Last month, I was asked to make a couple of dozen with Nova Scotia or coastal themes for a local outlet. I sat down to make them in a bit of assembly-line fashion. They are relatively quick little projects, very easy to make.
If you want to make them, there are lots of good tutorials with variations and styles.
Here are a couple:
Microwave Bowl Cozy – The Sewing Room Channel
10 Microwave Dish and Bowl Cozy Sewing Patterns
You can search and find a variety of styles and techniques. I didn’t use a pattern but there are many variations for free or for sale. My steps are included here.
Supplies
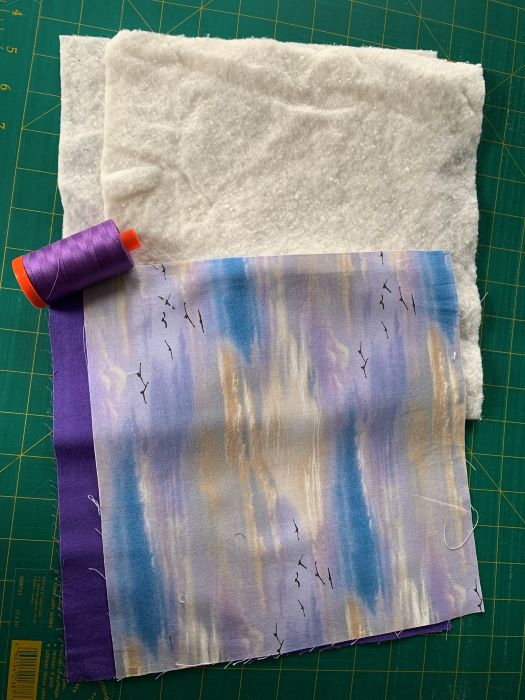
- 2 – 10 in. squares of cotton fabric
- 2 – 10 in squares of batting ( cut at 9 3/4 for less bulk in seams)
- Thread to match or contrast
NOTE: Use only 100% cotton as man-made fibres might melt or spark. I mostly use reclaimed materials or off cuts so sometimes not clear on content so I if I am not sure, I test to ensure they are cotton with a burn test or short microwave test. I’m also very meticulous about removing all scraps of fibre and thread.
I have read that you need to be aware of scrim because some companies use polyester in the preparation process so there might be trace amounts of poly in the surface. I have not had any issue with this and most people don’t even mention it so I don’t think there is need to worry but to be safe, you might want to advise people to not heat these bowl cozies for more than 3 minutes, a guideline I have seen in a number of places. As I say, I have not encountered any issues with batting after testing.
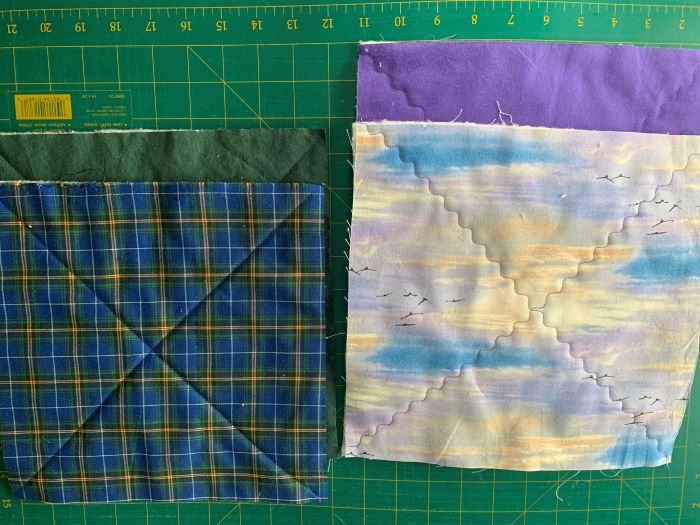
Sew each piece of cotton to a piece of batting, corner to corner. You can use a straight stitch (fastest) or something fancier. I like the serpertine and zigzag stitches for a little variety. You could go fancier but I don’t recommend anything too dense as it flattens the batting layer and could make it less effective.
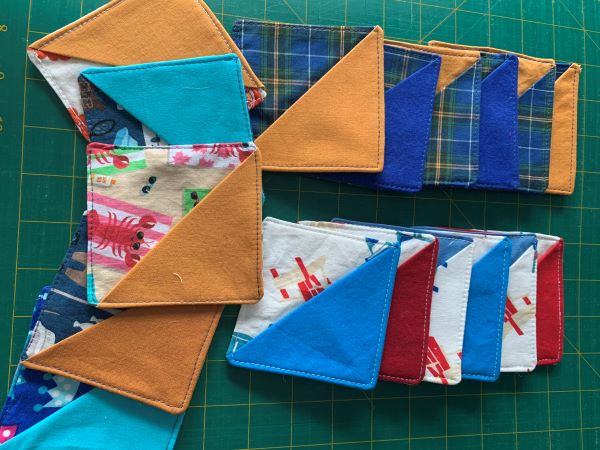
The sample on the right is our Nova Scotia Tartan.
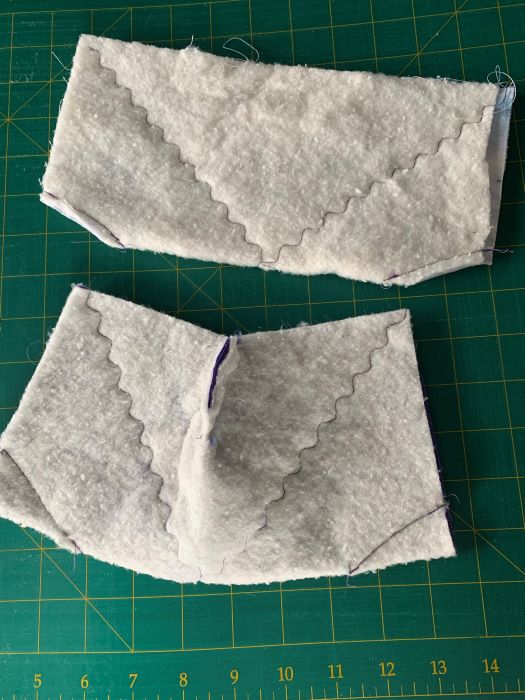
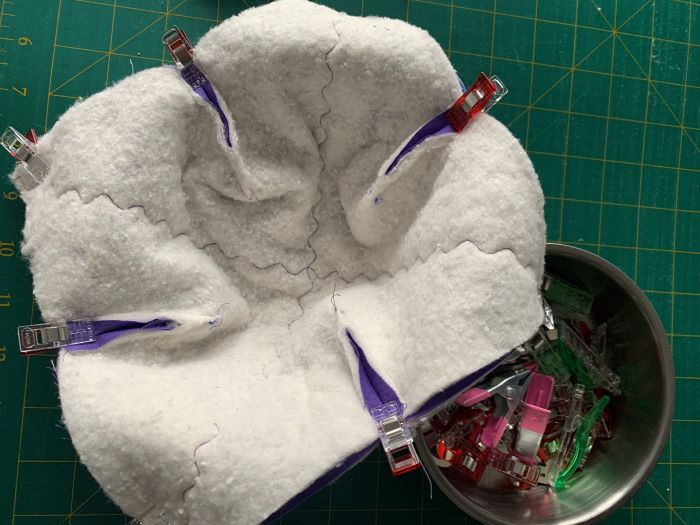
Fold the sewn squares in half. Make a mark 2″ on the fold side and 1″ on the unsewn side. Sew between the two – you can draw a line if it is easier. It is a short distance so I just eyeball it. Optional: Cut the corner off to reduce bulk. (TOP)
Open the square and fold in half the other way. Mark the corners and repeat steps on the first side. (BOTTOM PICTURE, before cutting corner)
Press the seams open (finger pressing is enough) and turn the two sides together. Sew all the way around at about 1/4 inch – leave an opening of 3-4 inches on one side to turn right – side out.
Turn the cozy right side out and iron. Top stitch all around to close the gap and give the cozy a more finished look. (ooops. missed getting a picture of that stage)
That’s it. Ready to use. All cotton so fully washable and very handy.
Scrappy Book Marks
I used scraps from the microwave bowls to make a stack of coastal-themed bookmarks. Picture above left shows samples, the one on the right is one in use.
Supplies for bookmarks:
- 3 x 4″ squares, one folded and ironed in half to make a triangle, right sides out
- (optional) medium weight iron-on interfacing for back of the two squares and inside of the triangle (optional) – I have tried making with and without and didn’t really notice a difference in the strength of the bookmarks. Try your own experiments.
To assemble:
- Put the two squares, right sides together with the folded triangle in the middle, fold to the center
- Stitch around the outside, leaving 2-3 inches to turn right side out
- Iron and topstitch
Dragonfly Wall Hanging (WIP)
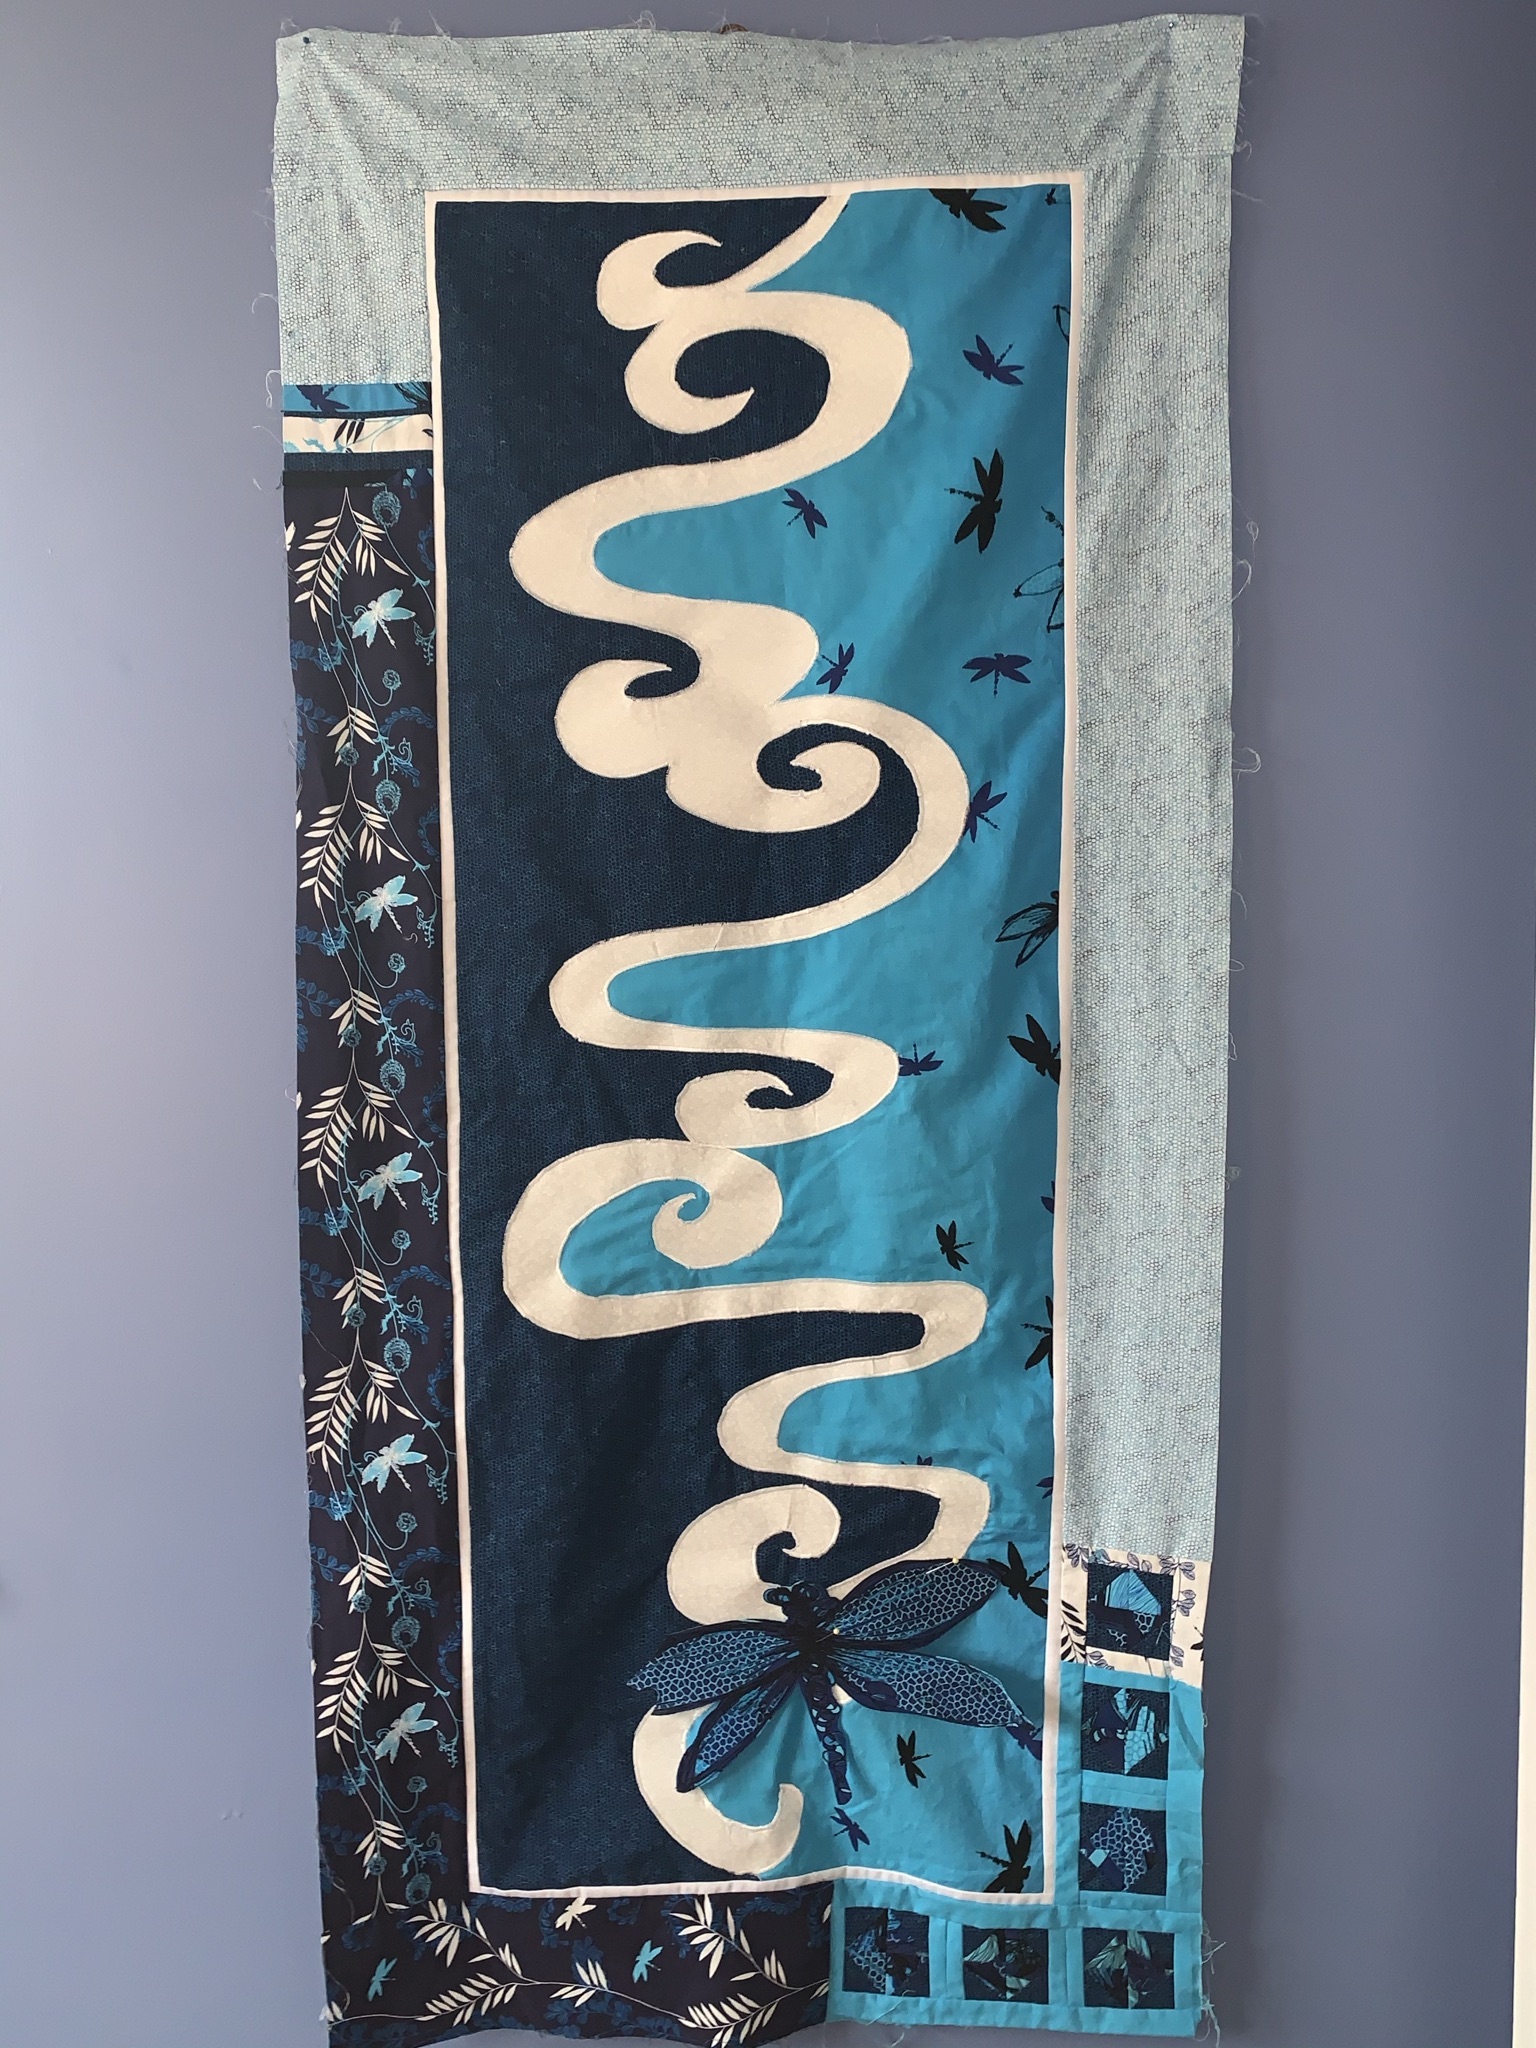
This one is more a teaser than a finish but I did make some progress on it.
It is a wall hanging started in a workshop a few years ago and packed away waiting for inspiration to occur. It has Japanese-inspired elements like asymmetrical borders, simple leaf motif and pinwheels, as well as the white ‘river’, which I cut and secured this week. I have cut out a number of dragonflies and intend to make them into 3D shapes. Stay tuned for more in the coming weeks.


those bookmarks look so wonderful.. i am going to show these to my teenager – she is the one who knows to sew 🙂
Thank you – they are really fun and quick to make – and very handy to have around for sure.
Gorgeous – your pics make the instructions so easy to follow!
Thank you. These are fun little projects.
Mary Elizabeth, what fun projects, these microwave cozies! My mother used to drink hot tea by the potfull and was always pleased when she found the occasional attractive cozy. Of course, the microwave cozies are for the opposite purpose– not to keep the dish hot, but to protect our fingers. 🙂 And I may make some of the bookmarks myself. Thanks for the fun ideas!
Thanks, Kebba. I remember my mom also being quite happy with new tea cozies. And I can still see Dad reading with his nightly toast and the always-present covered teapot. Thanks for bringing up those memories. The bookmarks are quick and practical, a perfect project for something fast on a rainy day.
This looks like an interesting project.
Rather than try to make some myself, I think I will look for them the next time I visit Nova Scotia.
Thanks for commenting. We always love having visitors to Nova Scotia — and we are all looking forward to being more open so we can again welcome people with our famous hospitality